
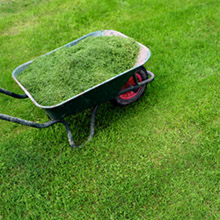
Turfgrass can be established a variety of ways. The method you choose will be determined by the situation your lawn is in. Do you have a new construction? An existing lawn that is thin and rough? A fair lawn that is just a little thin? Depending on what condition your lawn is in will determine where to start. Let's say you have a lawn that is in fair condition but needs thickened up. An easy way to do this is to Aerate and overseed. An aerator is a machine that will poke a hole in the ground (thousands of them actually) and remove a core of soil and leave it laying on the surface. To start with, mow your grass as low as you can safely, don't throw rocks and dig dirt with the mower, but get it down to about 1" high.This will stunt the grass and slow it's growth allowing the new grass that you will seed to get started with limited competition from the existing grass. After mowing take an aerator and go over the entire lawn at least twice. Depending on the model you use, the aerator will poke holes every 2 to 8 inches apart.
Once your done aerating, spread your grass seed. Spread the seed with a spreader of any type, do not use your hand and just throw it around, you won't get even coverage. Spread the seed using half of the required amount spreading it in one direction, use the other half spreading the opposite direction creating a cross hatch pattern on the lawn. This way you are assured of getting even coverage. After spreading the seed take a drag of any type, a piece of chain link fence, a board with a rope tied to it, or what ever you can drag behind your mower. Drag the lawn, this will push and drag seed into the holes you created and break up the little plugs of soil that the aerator left on the ground, it will cover up most of the seed giving much better germination and a thicker lawn. After dragging, spread a starter fertilizer, this can be done first if you want, it really doesn't matter. A starter fertilizer has a higher middle number than first and last numbers (More Phosphate). You will need to put down 8 pounds per thousand square feet of a 6-12-12 or 4 pounds per K of a 6-24-24. This will give the ground the nutrients needed to germinate and start a turf lawn, thus the name "starter fertilizer".
After
the grass is about 3 weeks old you should be able to start mowing.
Cut it high! Fertilizing will also need to be done on a regular
schedule.
back to top
Most grasses will benefit from four applications of fertilizer
per year. Spread out 60 days apart starting in early spring approximately
30 days before the growing season starts in your area, continuing
through the growing season until fall. Spring fertilizing gets
the grass off to a fast start giving you that rich green color
everyone wants. A word of warning though, don't use too much fertilizer,
follow the listed guidelines on the bag. Too much fertilizer will
cause excess growth, lead to Fungus growth and weaken the grass.
Mowing is the most misunderstood part of lawn care, and the most
often incorrectly performed part of lawn care. Far too many people
will set their mowers too low or "scalp" the lawn. This
leads to thin and dying out grass, shallow root systems, and in
the long run, NO GRASS.
Lawn Mower Techniques
Once you have achieved the perfect lawn, after hundreds or thousands
of dollars on Renovating or installing a lawn, it just doesn't make
sense to let it go back to being a pasture from lack of watering
or other maintenance that needs to be done. Spend a little time
and money and keep it watered and you will keep the lush grass you
spent your hard earned money and time on. The Ideal way to water
your lawn is with an Automatic Underground Sprinkler System. This
way the watering is done every day that it needs it, you don't have
to drag hoses, you don't waste water from overwatering, you get
all of the lawn watered, not just where you happen to set the sprinkler.
How many times have you started the sprinkler then forgot to move
it? This wastes water and over waters some parts of the lawn while
other parts may never get water because it's too far to drag a hose
to. Another common problem in hand watering is that you can only
run one or two sprinklers at a time. If you have a very large lawn
this could take all day to water. Automatic systems will water when
you program the system to come on, once a day, every other day,
once a week, your choice for what needs to be watered. Also, shrubbery
and annuals need to be watered separate from the lawn. If you applied
the same amount of water on your landscape as gets put on the lawn
you would surely kill some plants from over watering. An automatic
system waters landscape plants on their own zone at the times they
need it, even multiple times per day for tender annuals like impatiens.
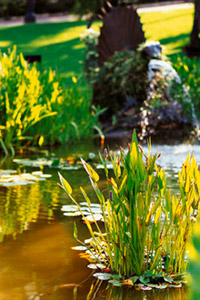
Floating
Foliage: Cover 40-60% of the pond surface (Water lilies,
floating and lily-like aquatics).
Oxygenating Plants: One bunch per two square
feet of surface area.
Fish: One inch of fish per 1-2 gallons of water.
Snails/Tadpoles: One per square foot of bottom
surface area.
Stocking the pond includes stocking of plants as well as other aquatic life such as fish, snails, etc. Ponds can be balanced through proper selection of plants and aquatic life. An environmentally balanced pond is one in which the interaction of life in the pond creates a clear and attractive pond. Remember, however, that crystal clear ponds are not necessarily healthy. Plants absorb carbon dioxide during the day and produce oxygen. Fish use the oxygen and produce carbon dioxide. All ponds should be sited in sunlight, since pond plants require sunlight for best performance. Algae growth is also promoted by sunlight, so shade must be provided directly on the water’s surface to discourage the growth of algae. Floating foliage plants such as water lilies, water hyacinth, and lily-like aquatics will accomplish this. Submerged aquatics provide oxygen, a food source and a place for fish to hide. Additionally they provide a place for fish to lay their eggs. Marginal plants take up excess nutrients in the water, inhibiting the growth of algae, and also assist the pond by absorbing heavy metals and other common pollutants. Fish control mosquitoes by eating larvae. Snails and tadpoles are the scavengers of the pond, eating algae and decaying vegetation. All combine to create the naturally balanced environment of a good garden pond.
Poor drainage can be a major cause of weak growth in new plants.
Avoid planting in places where water collects and stands after
rainfall. Make sure the location meets the sunlight needs of the
plants you want to grow. Prepare soil for planting flowers and
vegetable beds by deep spading or rototilling. Shrubs and trees
just need well-dug holes in the sod; but for good growth, the
soil must be kept spaded two or three feet around the plant and
this area kept cultivated or mulched.
(Similar to planting container plants)
1. Dig a saucer shaped hole at least twice as wide and deep as
the root ball.
2. Put the tree in the hole 1" higher than it stood in the
nursery. (Except heavy and sandy soils).
3. Remove any ties or straps that bind it. if there is too much
burlap at the top, turn it back so it will be below soil surface.
4. Fill mixture of original topsoil and organic matter around
the ball. Pack gently. Fill hole with water, let settle and finish
with more soil. Do not pack down.
5.Dig a 2-3 Inch doughnut basin around drip line and water again.
6. Finish filling top with a 3-4' mound of peat moss of mulch.
Keep mulch 3-4" from trunk.
The ideal time to prune trees and shrubs is in late winter,
when plants are mostly dormant. Finish heavy pruning by mid-February,
before buds show evidence of swelling. Don't take off more than
one-third of the living tissue during the year.
Before you prune, consider where you want the lowest permanent
branch located, since branches remain at the same height even
as the tree ages. If you want to walk or mow under a tree, prune
low branches while they are still small.
For trees with a strong frame, you'll only need to prune for maintenance
for the remainder of a tree's life, except for removing dead,
ailing or broken limbs or branches that cross or rub in the wind.
"Natural target pruning" uses locations normally produced
on branches. Look closely at a branch where it attaches to the
trunk for a slight bulge. This is the branch collar. Locate your
cut through this bulge (it will take practice to find), leaving
the smallest diameter wound possible without leaving a stub.
Use three cuts to remove large limbs: